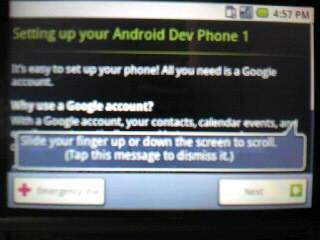
説明サイトを参考に Android Dev Phone を Rom バージョン 1.1 にアップデートしました。
アップデートに使用した PC は Linux(Ubuntu 8.10) です。
~$ cat /etc/lsb-release
DISTRIB_ID=Ubuntu
DISTRIB_RELEASE=8.10
DISTRIB_CODENAME=intrepid
DISTRIB_DESCRIPTION="Ubuntu 8.10"
Android SDK は以前インストールしたバージョンから変更しませんでした。
説明サイトには次の記述があります。
If your development machine is running Windows, you should make sure to update your USB driver before continuing. For your convenience, the Android SDK (1.0 r2 or later) includes an updated USB driver that you can install. For more information, see Setting up a Device for Development on the Android Developers Site.
軽く調べたかぎりでは、インストールされている SDK のバージョンを知る方法が分かりません。
うちは Windows じゃないので気にする必要はないのかもしれませんけど…。
Android Developer Blog を見るかぎり、Android 1.0 SDK, release 2 が出たのは 2008/12/5 あたりで、私が SDK をインストールしたのが 2008/12/19 あたりなので、多分大丈夫でしょう。
adb のバージョンはこんな感じでした。
~$ adb version
Android Debug Bridge version 1.0.20
なるべくクリーンな環境にしたかったので、手順にある通り userdata とかを消しました。
1.1 にアップデート後はインストールしてあったアプリケーションなどは全て消えていましたが、Market の My Downloads にはアップデート前にインストールしてあったアプリケーションのリストは残っていたので、そこから再インストールしました。
まず説明サイトから下記のファイルをダウンロードし、全て~/tmp に置きました。
fastboot.zip
signed-dream_devphone-img-130444.zip
ota-radio-1_22_14_11.zip
(1) fastboot コマンドの準備
~$ cd ~/bin
~/bin$ unzip ~/tmp/fastboot.zip
Archive:  /home/xxx/tmp/fastboot.zip
inflating: fastboot
~/bin$ ls fastboot
fastboot
(2) radio firmware の書き込み
(2-a) adb devices を実行
~$ adb devices
* daemon not running. starting it now *
* daemon started successfully *
List of devices attached
HT845GZ59637    device
(2-b) adb push を実行
~$ adb push ~/tmp/ota-radio-1_22_14_11.zip /sdcard/update.zip
916 KB/s (9131603 bytes in 9.728s)
(2-c) recovery mode へ移行
6. Reboot the device into recovery mode by holding down the HOME key during reboot. When the device enters recovery mode, it displays a "!" icon.
電源ボタンを長押しで電源を切り、ホームボタンを押しながら再度電源ボタン長押しで電源をONにする。
(2-d) log output を表示する
7. With the recovery console displayed, open the sliding keyboard and hold down the ALT+l key combination to enable log output in the recovery console.
キーボードの "Alt" と "l" を同時押しして、log output を表示する。

(2-e) update をインストール
8. Next, hold down the ALT+s key combination to install the update. An "installing update" icon and progress bar are displayed — when the progress bar completes, the installation is finished.
キーボードの "Alt" と "s" を同時押しして、updateをインストールする。
しばらく時間がかかる。

(2-f) radio image を書き込む
9. Press the HOME-BACK key combination to write the radio image, update the firmware, and automatically reboot. Note that if you do not use HOME-BACK at this point, the device will not load the updated radio image. After writing the radio image, the device shows a "updating firmware" icon for a few seconds and then automatically reboots in normal mode.
"HOME" と "BACK" キーを同時押しして radio image を書き込む。
黄色の文字が消え書き込んでいるような表示になる。

しばらくするとかってに再起動されました。
(3) System Image の書き込み
(3-a) fastboot モードで起動
電源ボタン長押しで電源をOFFにし、バックキーを押しながら電源ボタンを長押しでfastbootモードで起動する。

(3-b) fastboot erase を実行
~$ fastboot erase userdata
bash: /home/xxx/bin/fastboot: Permission denied
どうやら実行権限がないらしいので、実行権限を付ける。
~$ ls -l bin/fastboot
-rw-r--r-- 1 xxx xxx 127435 2009-02-26 12:21 bin/fastboot
~$ chmod +x bin/fastboot
~$ ls -l bin/fastboot
-rwxr-xr-x 1 xxx xxx 127435 2009-02-26 12:21 bin/fastboot
再度 fastboot erase を実行する。
~$ fastboot erase userdata
erasing 'userdata'... OKAY
~$ fastboot erase cache
erasing 'cache'... OKAY
(3-c) fastboot updateを実行
[-W]ってあるのを付け忘れました。
help見た感じでは大丈夫かな…。
多分。
~$ fastboot --help
usage: fastboot [  ]

commands:
update                         reflash device from update.zip
flashall                                 flash boot + recovery + system
flash  [  ]         write a file to a flash partition
erase                         erase a flash partition
getvar                         display a bootloader variable
boot  [  ]              download and boot kernel
flash:raw boot  [  ]    create bootimage and flash it
devices                                  list all connected devices
reboot                                   reboot device normally
reboot-bootloader                        reboot device into bootloader

options:
-w                                       erase userdata and cache
-s                        specify device serial number
-p                              specify product name
-c                              override kernel commandline
-i                            specify a custom USB vendor id
~$ fastboot update ~/tmp/signed-dream_devphone-img-130444.zip
archive does not contain 'boot.sig'
archive does not contain 'recovery.sig'
archive does not contain 'system.sig'
--------------------------------------------
Bootloader Version...: 0.95.3000
Baseband Version.....: 1.22.14.11
Serial Number........: HT845GZ59637
--------------------------------------------
checking product... OKAY
checking serialno... OKAY
checking version-baseband... OKAY
checking version-bootloader... OKAY
checking version-cpld... OKAY
sending 'boot' (1500 KB)... OKAY
writing 'boot'... OKAY
sending 'recovery' (1722 KB)... OKAY
writing 'recovery'... OKAY
sending 'system' (53645 KB)... OKAY
writing 'system'... OKAY
rebooting...この後かってに再起動されました。
(4) アップデート完了後
再起動後のGoogleアカウントの設定は無線LANに繋がることが出来ずにエラーとなりましたが、SKIP することも出来るので、とりあえず SKIP しました。

Google account を設定せずに起動完了。

Firmware version を確認すると 1.1 になっていました。
無線LANを設定し、「Settings → Data synchronization」 を実行すると「Set up Google account」が起動したので、Google account の設定を行いました。
インストールしていたアプリは全部消えましたが、「Market → My Download」には記録が残っていたので、そこから再度インストールし直しました。
こんな感じで終了です。
0 件のコメント:
コメントを投稿